Monday, February 25, 2013

Lentil Stuffed Cabbage Leaves
(Lahanodolmathes Orfana)


There's a scene in the movie, My Big Fat Greek Wedding where the Greek family is horrified that the man their daughter is about to marry, is a vegetarian. The news silences the room and everyone's faces drop with pity for the man.

This is something I go through A LOT, with friends and family members thinking that I'm missing out on something that would otherwise make my life wonderful. That being a vegetarian is something that I must be really struggling with. That life without meat must be devastating for me.

So it's no surprise that the word "Orfana" is used at the end of a Greek dish title to indicate that it's a vegetarian version of a dish that would normally contain meat. The dish is considered "orphaned" without its meat component. This probably originated from a time when poorer families had to resort to eating meatless dishes when they couldn't afford to buy meat. Meat was for the fortunate ones, and if you couldn't afford it, you just had to settle for the much more inferior, poor-man's version of the dish.

It's interesting then, that there exists so many delicious Greek vegetarian dishes. These dishes may have once emerged as a result of the poorer times in Greece, but the fact that they still exist in today's Greek cuisine indicates that there's no denying these dishes actually taste really good without meat!


One such dish is Lahanodolmathes Orfana which are cabbage leaves stuffed with rice and herbs, and slow cooked in either an egg and lemon sauce or a rich tomato sauce.

In my version of this dish I have added lentils to the rice mix. I love the combination of rice and lentils, especially when used as a stuffing. The lentils help hold everything together, and add a bit of bulk and texture to the filling. They also taste lovely when cooked in a tomato sauce so my recipe today utilises the lentil and rice filling, a rich tomato sauce, and the gigantic cabbage that I received in my organic veggie box last week.


Lentil Stuffed Cabbage Leaves (Lahanodolmathes Orfana)


Serves 4–5

Ingredients

  • 1 large cabbage
  • 2 cups cooked lentils
  • 1/4 cup uncooked long-grain rice
  • 1 tablespoon tomato paste
  • 1/4 cup olive oil
  • 2 large onions, finely diced
  • 1 egg, lightly beaten

For the tomato sauce
  • 2 cloves of garlic, crushed
  • 2 400g cans chopped tomatoes
  • 1 teaspoon dried oregano
  • 1/4 teaspoon cinnamon
  • 2 teaspoons honey or 1 teaspoon sugar

Instructions

  1. Place whole cabbage in a large pot, cover with water, bring to the boil and let simmer for 5 or 6 minutes.
  2. While the cabbage is cooking, fry the garlic for one minute until fragrant, then add chopped tomatoes, oregano, cinnamon, honey (or sugar) and salt and pepper to taste. Bring the tomato mixture to the boil and allow to simmer until you finish preparing the cabbage leaves (around 20 minutes).
  3. Heat remaining oil in a separate pot and set the onions to fry over low heat for around 20 minutes, or until golden, stirring occasionally.
  4. Meanwhile, remove cooked cabbage from pot, drain and rinse under cold water. Carefully remove 8 to 10 large leaves from the cabbage, blot dry with a paper towel and trim thick parts of the stem using a paring knife, being careful not to slice through the cabbage leaf. The idea is to make the leaf as uniformly thin as possible, to enable easy rolling.
  5. Roughly chop up the remaining cabbage and use about two cups of this to cover the bottom of a heavy-based saute pan. You will need a pan that is around 25cm diameter with 6cm-high vertical sides and a lid. Drizzle with a few tablespoons of olive oil and set aside.
  6. Place cooked lentils, cooked onions and tomato paste in a large bowl, mix with your hands and season with salt and pepper to taste. Then add uncooked rice and egg and continue to mix with your hands until well combined. The mixture will be quite sloppy but will firm up when cooked.
  7. Remove tomato sauce from heat, cover and set aside. It should have been cooking for at least 15 minutes, but no longer than 30 minutes.
  8. Place about three teaspoons of the lentil filling onto a cabbage leaf and carefully roll up, folding in the sides before completing the roll, and place seam-side down on the bed of chopped cabbage in the saute pan.
  9. Repeat with remaining mixture and arrange all cabbage rolls in one layer in the saute pan.
  10. Pour tomato sauce over cabbage rolls until completely covered. It should look like this:


  11. If the sauce doesn't completely cover the rolls, add water.
  12. Place lid over pan and simmer on very low heat for 2 hours.

This dish is hearty and healthy and freezes really well. Just defrost and reheat in a saucepan over low heat with the lid on. You can add a small amount of water if necessary.


I'm linking this post with Veggie Mama's Meatless Mondays. Go take a look for some more fantastic vegetarian recipe ideas.


Saturday, February 23, 2013

Purple Carrot Tzatziki and
Eggplant and Walnut Dip


Right now our fridge is full to the seal with the weight of two and a half men's worth of organic vegetables that I had delivered to my door yesterday. The box arrived with rather large quantities of 15 different varieties of vegetable, some of which I've never cooked with before but can't wait to get my kitchen tools into.

There's more than Tony and I could get through in a week but I'm determined not to let any of it go to waste. Whether I make a batch of freezer-friendly soup or perhaps a stew, or share our bounty with the neighbours, everything in that refrigerator will be consumed. (I really should introduce myself to our neighbours. It's been almost three years after all and I'm sure they wouldn't mind me offering them a batch of pumpkin and feta croquettes since I'll have about 2,000 of them after I'm done with the massive pumpkin that's sitting in my fridge!)

The first vegetables I really wanted to play with were the purple carrots. I'd seen them in the shops a couple of times but never used or eaten them before. I did however know about their tendency to spread their wonderful hue over everything they touch once you start working with them, and the little dish I had in mind involved fine grating which was going to be VERY MESSY. Definitely a job for the food preparation surgical gloves (why someone didn't invent these nifty things 20 years ago I really don't know).

I was recently reading up on the culinary traditions of different Greek regions and discovered that some villages in the eastern parts of Greece use carrots in their tzatziki instead of cucumber. It adds a bit more texture and a brighter colour and has no excess liquid to squeeze out before mixing with the yoghurt. But have a look at how brilliant this purple carrot tzatziki has turned out!


Just like strawberry ice cream! But don't be fooled. With a heavy hit of garlic and the slightly bitter taste of the purple carrot, this silky dollop of pink delishiousness packs a very different punch to the sweet sensation of strawberry ice cream.


I use eggplants (aubergines) a lot in cooking, and it's an especially well-used ingredient in Greek cooking, but believe it or not, I've never made eggplant dip. Until today. The big shiny eggplants in my veggie box were going to be perfect for my first-ever melitzanosalata (eggplant dip).

I love the earthy depth of flavour that comes from an eggplant when roasted, and I wanted to add another ingredient to enhance that earthiness. Then I remembered a waiter at a taverna in Limnos telling me they make their eggplant dip with walnuts. Well how perfect is that. I just wish I had have thought of it myself, before remembering that someone else already thought of it! I did have the good sense though to add a bit of honey to this dip to take away some of the bitterness of the eggplant and it made a world of difference. Try it yourself, before and after honey. You might even prefer the bitter version sans honey.

I was really pleased with the results of both dips although in hindsight I think a tiny bit of tomato paste for the eggplant dip might have brightened it up a bit. It was rather outshone by the pretty party colours of the purple carrot tzatziki.


Purple Carrot Tzatziki


Makes about 2 cups

Ingredients

  • 1 purple carrot, peeled and finely grated
  • 2 cups Greek yoghurt*
  • 2 garlic cloves, crushed
  • 2 tablespoons fresh mint, finely shredded
  • 2 tablespoons extra virgin olive oil
  • 2 tablespoons lemon juice
  • Salt to taste
Click here for the recipe to make your own Greek yoghurt.

Instructions

  1. Combine all ingredients and you're done.
  2. Too easy!!

Eggplant and Walnut Dip


Makes about 2 cups

Ingredients

  • 2 eggplants
  • 2 garlic cloves, roughly chopped
  • 3/4 cup of shelled walnuts
  • 1/4 cup extra virgin olive oil
  • 2 tablespoons lemon juice
  • 2 teaspoons honey
  • Salt to taste

Instructions

  1. Preheat oven to 200 degrees celsius. Pierce eggplants several times with a fork, place on a baking tray and roast for 30 minutes, turning once after 15 minutes.
  2. Meanwhile, place the garlic, walnuts, lemon juice and 1 tablespoon of the olive oil in a food processor and pulse until the mixture forms a paste.
  3. Remove eggplants from the oven and allow to cool a little. The eggplants will be wrinkly and soft. Cut of stems and cut the eggplants lengthways and remove peel.
  4. Roughly chop eggplants and add to food processor along with remaining olive oil. Process until all ingredients are well combined then add honey and salt to taste.

Thursday, February 21, 2013

Massive Box of Organic Vegetables
home delivered


This is a quick impromptu post with no recipe (sorry!) but I just had to show you this.

LOOK WHAT I GOT TODAY! My first, organic, home-delivered veggie box!

I love getting packages in the mail but getting a gigantic box of groceries delivered straight to my door is simply child-like exciting. Especially when I don't know what's in it. I love surprises, and this one did not disappoint with a box-load of fresh, crisp vegetables, some of which I've never even tried before!

I'd never really thought about getting groceries home delivered but after being inspired by a post about organic veggie box deliveries on Liz's blog, I Spy Plum Pie, I decided to throw caution to the wind and see what might blow back my way. It was the not knowing what you might get that really got me interested in this.

I always tend to get the same staple vegetables every time I go to the fruit and veg shop, only venturing outside of my comfort zone when something like a white zucchini appears before me. There are many vegetables that I've never cooked with, never even eaten, like purple carrots and bok choy, and I know that if I'm given the choice to either cook with these scary vegetables or throw them away, I'm definitely not going to throw them away.

So take a look at my surprise package! Yes, there's purple carrots and bok choy! Corn on the cob and silverbeet! There's so much stuff here and I already have so many ideas! Lentil Stuffed Cabbage Leaves, Purple Carrot Tzatziki, Horta (Steamed Greens with Lemon and Olive Oil), Eggplant and Walnut Dip, Pumpkin and Feta Fritters, oh my goodness, so many vegetables, so much to cook and so little time!

It's just Tony and I (and our cat Simba) here in our household so we need to put a plan into place to make sure none of these beautiful veggies go to waste... hmmm, I'm also thinking freezer-friendly vegetable stew.


Tony and I have also been putting our heads together to come up with ideas and a menu plan for Tony's meat-free week challenge and my no-carb challenge. Remember, we need to prepare vegetarian, no-carb, Greek meals which is going to be no easy task, but certainly a challenge that we're up for! We've found a great recipe in one of Tony's diabetic cook books for a no-carb moussaka that utilises ricotta cheese for the topping instead of bechamel sauce. I think this one will definitely have to be our first meal for Meat Free Week which begins in 25 more days.

You can read more about Meat Free Week here. And don't forget you can sponsor Tony for the Meat Free Week challenge by clicking here and funds raised will go to animal protection organisation, Voiceless.

I'll be back tomorrow with the first creation from my veggie box ingredients!

The veggie box I had delivered came from Victoria Organic Delivery. They deliver organic fruit, vegetables and other groceries to most Melbourne suburbs.

Monday, February 18, 2013

Fennel, Zucchini and Feta Tart
and Tony goes on the Meat Free Week challenge


I'm a vegetarian and my partner Tony eats meat. We've been living this way together for six years and by understanding the reasons why we've decided to eat what we eat, we have a mutual respect for each other and the choices we've made.

Tony loves animals as much as I do, but he is on an eating plan designed for diabetics (Tony has Type 1 Diabetes) that includes a variety of proteins and very limited carbohydrates.

I love my carbohydrates, and I don't eat meat, chicken or fish so it is rare for us to ever be eating the same meal. Our differences in food choices also means that we are cooking our meals separately which is a shame because we both love to cook and it would be nice to cook together more often.

I don't give Tony or anyone else a hard time about their meat-eating choices, but I talked to Tony last night about an idea that I had, inspired by the desire for us to be a bit more creative in the kitchen so we can enjoy some cooking time together.

The idea goes a little like this: For one week Tony won't eat any meat, chicken or fish, and in return I will go without my beloved carbs. We will spend the week cooking meals together that we will eat together. And to add to that challenge, the meals will need to be based on Greek recipes so I can post them on the blog! Vegetarian, low-carb, Greek food. Now that will be a challenge!

It's no coincidence that this has come about at the same time as the approaching Meat Free Week. In fact, it was VegeTARAian's post on her blog about Meat Free Week that started this whole idea in my head in the first place.

Meat Free Week is an Australian initiative to encourage people to eat less meat. The idea is for people to go without meat for one week, from the 18th–24th of March, and to be sponsored for this challenge. The proceeds go to the Voiceless organisation who works on raising awareness of factory farming and the negative impact that eating too much meat has on animal welfare, the planet and human health.

Today I am signing Tony up to become a participant in the Meat Free Week challenge and we would love you to show your support by sponsoring him. If you'd like to sponsor Tony, please go to the Sponsor page on the Meat Free Week website, and search for Tony's username which is: "Tony Tries Tofu". Alternatively, you can go directly to Tony's personal Meat Free Week profile page by clicking here.

We think this is a great initiative and look forward to seeing it develop into a philosophy that more and more people will take on board.

I will be posting every day during Meat Free Week, detailing the meals Tony and I eat together (wow what a strange concept, Tony and I eating together!) and hopefully some of our recipes will inspire others to do the same.

There are so many yummy meatless meals that everyone can enjoy including today's Greek Vegetarian recipe, Fennel, Zucchini and Feta Tart. This is an easy peasy puff pastry dish, a little bit quiche, a little bit pie, a little bit tart and a whole lot of Greek.

With a giant fennel bulb and a fridge-load of zucchini that needed to be put to good use, I scoured through the wonderful Authentic Greek Recipes blog for something with fennel and zucchini. I came across their recipe for Kolokithopita (Zucchini Pie) which I adapted to create this lovely, light summer tart.


Fennel, Zucchini and Feta Tart

Inspired by Symposio from Authentic Greek Recipes

Serves 4–6

Ingredients

  • 1 large fennel bulb, sliced
  • 2 onions, sliced
  • 1 teaspoon of whole fennel seeds
  • 3 large zucchinis, sliced lengthwise to 1/2 cm thick
  • 100g feta cheese, crumbled
  • 2 potatoes, sliced to 1/2 cm thick
  • 1 large sheet of puff pastry
  • 3 eggs, lightly beaten
  • 120ml cream*
  • 2 tablespoons fresh mint, finely chopped
  • 2 tablespoons fresh parsley, finely chopped
  • Salt and pepper to taste

* Many thickened creams contain gelatin which is an animal by-product. Be sure to check the label.

Instructions

  1. Fry the sliced fennel and onion in olive oil over low heat. Allow to cook until golden and caramelised which takes around 30 minutes, stirring occasionally. Add the fennel seeds in the last 5 minutes of cooking.
  2. Meanwhile, fry or grill on a baking tray the potato and zucchini slices until golden brown.
  3. Preheat oven to 180 degrees celsius. Line a lightly greased pie dish with pastry, trim edges and pierce pastry lightly with a fork. Line with baking paper and fill with pastry weights or rice. Blind bake for 15 minutes.
  4. Carefully remove baking paper and beads/rice and put the tart shell back in oven for another 5 minutes. Allow to cool.
  5. Fill tart shell first with potatoes, then zucchini, then the feta, and topped with the onion and fennel mixture.
  6. Combine the eggs, cream, mint, parsley, salt and pepper to taste and whisk.
  7. Pour the egg mixture over tart and bake for 45 minutes or until knife comes out clean when inserted in the centre of the tart.


Linking this post with Veggie Mama's Meatless Monday.

Friday, February 15, 2013

Home-made Greek Yoghurt


I find commercial yoghurt here in Australia just a bit yuck. The flavoured varieties are sickly sweet and most natural yoghurts are just too sour for my liking.

But commercial Greek yoghurt from Greece. Now that's another story.

Let me tell you, the Greeks know how to make yoghurt. Thick, creamy, silky smooth dollops that send you to yoghurt heaven with every devouring mouthful. No sour taste, no sugary flavours. This is the stuff that I would give up chocolate for.

Unfortunately, finding somewhere in Melbourne that imports this precious pot of velvety goodness is not an easy task, and even if you do happen upon it, the chances of it still being fresh are pretty slim.


The next best thing, and based on some of my own results sometimes even better thing, is home-made Greek yoghurt. Yes! You can make this gorgeous stuff at home, and very easily I might add. Once you've made your own yoghurt, you'll never go back to store bought (unless you live in Greece!).


Home-made Greek Yoghurt


Makes about 400–500ml

Ingredients

  • 1 litre of full-fat milk
  • 2 tablespoons of starter yoghurt*
* Store-bought full-fat natural Greek style yoghurt makes a great starter yoghurt. For best results, make sure the yoghurt contains two specific cultures: S. Thermophilus and L. Bulgaricus. Alternatively, your starter yoghurt can be from a batch of previously-made yoghurt.

Instructions

Heat the milk over medium heat until just simmering, ensuring the milk doesn't boil. You will also need to stir it every now and then to prevent a skin from forming.

Remove from heat and transfer the milk to a glass or plastic bowl. Allow to sit, uncovered, stirring occasionally, until the temperature of the milk reaches a point where you can comfortably leave your little finger in the liquid for 10 seconds – it needs to be lukewarm.

At this point, take a couple of tablespoons of the milk from the bowl and mix with 2 tablespoons of yoghurt in a separate cup, just to make it runny enough to add back to the bowl. Once added to the bowl of milk, give it a good stir and cover the bowl with a clean tea towel and then wrap the whole bowl with another large towel. I also wrap a very pretty scarf around mine.


Incubating

The next part is fairly crucial so please read carefully. Temperature is very important. The bowl must be kept in a consistently warm place to incubate for the next 5 to 8 hours. The timing depends on how sour you like your yoghurt and how warm the temperature is. The longer you leave your yoghurt to incubate, the more sour it will become.

The temperature needs to be between 32 and 49 degrees celsius, however, 43 degrees is the optimal temperature. The closer the temperature is to 43 degrees, the less time you will need to incubate your yoghurt.

To maintain a constant optimal temperature, some people use the oven switched on for around 30 seconds then off again every hour or so; others like Christine from Slow Living Essentials might place their bowl near the fireplace on a cold winter's night. In summer I wait for a scorcher of a day (it reaches 40 degrees celsius here in Melbourne on many a summer's day) and just sit the bowl outside or in the sunroom. If your bowl is sitting out in the sun it needs to be heavily wrapped in towels to prevent the sunlight from spoiling your yoghurt.

Leave the bowl undisturbed for at least 5 hours. You can leave the yoghurt to incubate for anywhere up to 8 hours but as mentioned above, the longer you leave it, the more sour the taste. I much prefer a less sour yoghurt so my incubation period is 5 hours. However, keep in mind that a 5-hour incubation period requires the temperature to be close to optimal. Greek yoghurt really shouldn't be too sour anyway.

After incubation, your new bowl of yoghurt should be set. It may have a layer of whey (yellowish watery liquid) on top. Mine never seems to develop the whey layer at this stage but if your yoghurt has whey that's quite okay. And after straining (see below), you will have lots more whey to do with as you wish, if you are that way inclined. (Unfortunately, whey for me is still one of those yucky substances that I can't quite bring myself to consume or utilise in any way just yet. Don't shoot me! I have many odd food aversions.)

After your preferred incubation time, remove the bowl from the heat source, remove its garments, cover with cling film and refrigerate for at least another 4 hours.

Straining and thickening

Now, this is the Greek part. Remove the bowl from the fridge and whisk your yoghurt thoroughly to break down any lumps. Place a fine-mesh strainer that has been lined with two layers of cheese cloth over a large bowl, ensuring the cheese cloth hangs over the outside of the strainer, but inside the bowl. Pour the yoghurt into the strainer, cover the entire bowl with cling film and return to the refrigerator.


After 8 hours or so the excess whey will have drained into the bowl and (in my case) can be discarded. Now, I know there are many whey lovers out there and I don't mean to disrespect the nutritious powers of whey. Whey is full of protein, vitamins, minerals and enzyme goodness and can be used in bread baking and soup stock, so please keep it and use it if you don't want to discard it.


The resulting yoghurt is thick and creamy and to complete the Greek yoghurt experience, you must drizzle with honey and a light sprinkling of cinnamon.

Tuesday, February 12, 2013

Galaktoboureko (Greek Semolina Custard Pie)
and a visit to Edgar's Mission


Well, just when I thought it wasn't possible, my love for animals has hit a new high. After spending the day volunteering at Edgar's Mission last Sunday and meeting so many beautiful creatures, Tony and I came home feeling nothing but blissful happiness and overwhelming love for the animals we'd met that day.

The reason I'm a vegetarian is because I love animals so I'm afraid this is going to be a rather long post about our day at Edgar's Mission. But please bear with me as I do have a recipe for one of the most heavenly delicious Greek desserts to tell you about as well!

Edgar's Mission is a not-for-profit sanctuary for rescued farm animals. They rely solely on donations and the help of volunteers. Anyone can get involved by participating in one of the dedicated volunteer days which are held once a fortnight. The volunteer days are open to all who want to come and help with cleaning and tending duties on the property.


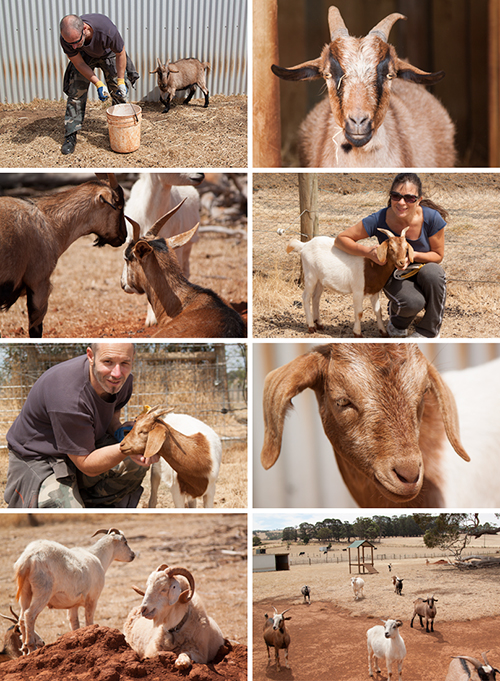
It was a hard day picking up goat poo all morning whilst trying to resist the very persistent body nudges from around 25 goats that resided in the paddock we were assigned to clean up, but we wouldn't have had it any other way.

Tony and I and two others were given the task to pick up goat droppings by hand (it's the only way to collect the tiny black pebbles from the dry grass), clean out their water trough and replace the straw in their bedding. Other volunteers had the muddy pig paddocks to clean out and another group had to work in plumes of dust as they swept up the chicken shed. There were around 30 volunteers, each with a different job to do, and I think we ended up with the best job of them all tending to our cloven-hoofed friends.


One of the little goats in our paddock absolutely stole our hearts. I'd never known goats to be overly affectionate, but "Boots" as he was named was the most adorable little thing – he was just like a puppy. He followed us around everywhere, not after food like the other goats. He just wanted to be cuddled and have his neck scratched, and boy did he get plenty of that from us.


Boots was just a tiny kid goat when he was found by Victorian Dog Rescue on the side of the road near Mildura around six months ago and brought to Edgar's Mission. Along with hundreds of other animals, Boots now has a safe and loving environment to live and is taken care of by manager of Edgar's Mission, Pam Ahern and her team of fabulous volunteers.

The sanctuary is home to pigs, cows, sheep, goats, dogs, cats, an alpaca, deer, turkeys, ducks and lots and lots of chickens. There are over 60 acres for the animals to share and the property is very well laid out with separate paddocks for each group of animals, large sheds and sheltered areas, and warm safe-havens for the sick and injured animals.


Tours of the property are conducted twice a week (check the website for dates and times) and there happened to be one on the afternoon we were there so after our work was done we joined the tour and heard many heart-breaking stories of how the animals came to be at Edgar's Mission. We also got to hand feed some very hungry cows and sheep which was a lot of fun.


In December last year Edgar's Mission undertook a massive rescue of 752 battery hens. A factory farm had just been purchased by a man who decided he didn't want to continue with the cruel practice of keeping caged hens, and rather than send the hens to slaughter, the kind man called on Edgar's Mission to rescue them.

Many of the hens have now been re-homed, but around 200 of them are still looking for loving, caring homes. If you are interested in adopting one or several of the hens, you can complete the prospective adoption form on the Edgar's Mission website.


The above photo is the large shed that houses the chickens at night. The doors are wide open during the day for the chickens to roam free over the property's 60 acres. Some of them wander around outside, pecking and scratching at the ground but most of them prefer to just hang in the shed.

With so many happy hens free-ranging on the property, there's an abundance of fresh eggs that Edgar's Mission sells for only $3 per dozen. We took home two cartons and very quickly put them to good use.


Galaktoboureko is a deliciously sweet semolina-based custard pastry, a little like vanilla slice, but much, MUCH better. Some recipes call for ten eggs, others only four. On this occasion I'm meeting the recipes half way and going with the six-egg version.

My inspiration to make galaktoboureko today came from a combination of elements: a suggestion from my older sister Melinda that it was time to add another dessert to the blog; reminiscing about a wild day in the kitchen with Aunt Koula in Limnos last year making this dish; and of course having in my possession a whole lot of fresh eggs from Edgar's Mission.


I have so many recipes for Galaktoboureko I didn't know which one to use, so I combined some of Koula's secret tips with a recipe from Ourania Vayakou's Recipes from Limnos and I have to say, the Galaktoboureko I produced today would have to be the finest I've ever made. I've already eaten two pieces. I do feel a bit sick, and what I'm about to say might make you feel a bit sick too... but I know what I'll be having for breakfast!

Galaktoboureko (Semolina Custard Pie)

Adapted from Recipes from Limnos by Ourania G. Vayakou

Serves 12–24 (depending on how much you can take in one sitting)

Ingredients

  • 1 packet of thick filo pastry*
  • 200g butter
  • 1 1/3 litres of milk
  • 130g fine semolina
  • 400g sugar
  • 6 eggs
  • 1/2 teaspoon vanilla essence

For the syrup

  • 2 cups of sugar
  • 2 cups of water
  • 1 teaspoon of lemon juice
  • 1 sliver of lemon peel

* In Australia there is a packaged filo pastry product that comes in thin and thick sheets. You can use either for galaktoboureko. If using thick filo you'll need 9 sheets, if using thin filo you'll need 15 sheets.

Instructions

  1. Preheat oven to 180 degrees celsius. 
  2. Beat the eggs and sugar in a large bowl for around 5 minutes, until the mixture becomes pale and smooth. Then add the milk and semolina and mix well.
  3. Transfer the custard to a large saucepan and bring to the boil while stirring constantly.
  4. Turn the heat down to a simmer and keep stirring for another five minutes, until the froth disappears from the top and the custard thickens. The semolina will give the custard a slightly grainy texture.
  5. Remove from heat and stir in the vanilla essence. Cover, set aside, and try not to eat too much of it before using it for this dish.
  6. Melt the butter over low heat and place saucepan on your work bench next to your baking dish and filo, ready for assembly.
  7. Line the inside of a large baking dish with well-buttered filo sheets, placing 3 sheets on the left-side of the dish and another 3 on the right (or 5 and 5 if using thin pastry), overlapping in the centre and buttered between each sheet. The sheets need to hang over the edge of your dish.
  8. Pour the custard mixture into the dish and spread evenly.
  9. Fold the over-hanging pastry back over the custard and lay the remaining 3 (or 5) sheets of pastry over the top, brushing each sheet with butter. If your top layers of pastry hang over the edge of your dish, trim to neaten.
  10. Brush the top layer with more butter and carefully score the pastry into portions.
  11. Bake at 180 degrees celsius for 45 minutes, or until the top is golden brown.
  12. While the galaktoboureko is baking, make the syrup (see below) then set the syrup aside until needed.
  13. Remove galaktoboureko from oven and immediately pour syrup over hot galaktoboureko.

Syrup

  1. Combine sugar, water, lemon juice and peel in a medium saucepan and heat while stirring to dissolve the sugar.
  2. Bring to the boil and allow to simmer for 8 minutes without stirring. The syrup should still be clear with no honey tinge to it.
  3. Remove from heat, remove the peel and set aside until galaktoboureko is cooked.

Unfortunately you will have to wait for a couple of hours before you can eat your galaktoboureko. That's right, you have to sit there and just look at it until the syrup has penetrated and the custard is fully set. If you try to cut it up while it is still hot, the custard will ooze out everywhere.

Galaktoboureko is best served at room temperature on the day of baking. I guarantee it will make you melt in your chair if you eat it this way. Try not to refrigerate until everyone has had a piece (if there's any left over!). It does, however, need to be refrigerated after the first day, and will keep for two more days. You can garnish with finely shredded orange or lemon peel, or sprinkle with almond flakes and dust with cinnamon.


Sunday, February 10, 2013

Greek Briam (Roasted Vegetables, Greek Style)
The easiest vegetarian Greek dish you'll make!


Before I get to today's recipe, I just wanted to say that after only a few weeks of blogging I've been really humbled by the response I've received. It's so nice to know that people are reading and relating to my posts. It really motivates me to want to build this blog into something that not only provides me with a creative outlet, but inspires others to embrace Greek vegetarian cooking, or perhaps persuades those that are thinking of becoming vegetarians, to go all the way.

I know there are just a handful of you so far, but I want you all to know how much I love reading your comments and how happy it makes me that you are enjoying what you see here :)


And one more thing before I tell you about Greek Briam. Tony and I are very excited about a little job we will be doing together today. We will be volunteering at Edgar's Mission – a sanctuary for rescued farm animals. I will be writing a bit about our day in my next post, but for now, let's get making some Greek Briam!


This is a dish that is so easy you won't even realise you've made it. It's basically oven-roasted vegetables, Greek style. And it's simply the herbs, garlic and olive oil that gives these vegetables that classic, unmistakable Greek flavour.

If it's a warm day, open your doors and windows and let the aromas from the kitchen be shared with your neighbours, just like a Greek village at lunchtime!


Greek Briam (Roasted Vegetables, Greek Style)


Serves 4–6

Ingredients

  • 2 potatoes
  • 3 zucchinis (courgettes)
  • 2 eggplants
  • 2 green capsicums
  • 2 onions
  • 2 large ripe tomatoes
  • 5 cloves garlic, roughly chopped
  • 3 tablespoons fresh parsley, roughly chopped
  • 2 teaspoons dried oregano
  • 150 ml olive oil
  • 500 ml water
  • Salt and pepper to taste
  • 200g feta cheese

Instructions

  1. Slice all the vegetables into round pieces, about 1 centimetre thick.
  2. Place all the ingredients in a large oven dish and bake in a pre-heated oven at 180 degrees celsius.
  3. After one hour, remove dish from the oven and use the back of a fork to press the vegetables down into the liquid.
  4. Turn oven up to 200 degrees celsius and return dish to the oven for another 30 minutes, until most of the water has evaporated and only the oil and some vegetable juices remain.

Allow everyone a generous helping of briam with loads of feta cheese crumbled over the top. The vegetables can be served warm or at room temperature and of course the flavours are even better the next day.

The vegetables and their juices also freeze really well, portioned into zip-lock freezer bags or air-tight freezer containers. Just pop a bag in the refrigerator the night before to defrost, then empty the vegetables into a baking dish, cover with foil and heat in the oven at 180 degrees for 20 minutes.

This post is linked with Veggie Mama's blog for Meatless Monday.


Friday, February 8, 2013

White Zucchini, Avocado and Cos Salad


White Zucchini Obsession Day concluded with this refreshing summer salad that I had been dying to make ever since my last trip to Greece. Now don't be scared but it involves boiled zucchinis that are served cold with lemon juice and olive oil.

Boiled zucchinis can be revolting – I've tried many times with the dark skinned variety and they often turn out water-logged, bitter and sometimes even slimy. But in Limnos last year Tony and I experienced a very different kind of boiled zucchini, using the beautiful white variety of zucchini that I have been incessantly raving on about for the last few days.


When I was growing up the only relatives my sisters and I knew about were my mum's sister, my mum's father, my mum's Aunty Betty and one cousin. That was it. And that was VERY unusual for a Greek family. Only four extended family members. But that was in Australia.

Little did we know there were more of us back in Greece. My dad's parents, his two sisters and a brother, children of those siblings and many other cousins from both my mum's and dad's side. But it wasn't until I was in my 20s and 30s that I finally got to meet some of these relatives while on holiday in Greece.

My dad's brother, George, and his wife, Koula, live on the island of Rhodes which is located in the very southeast part of the Aegean Sea, below Turkey. It gets very hot down there in the summer and during this time George and Koula stay at the family house in Limnos where the climate is more bearable during the hotter months. As my dad and his wife Julia spend most of the year at the Limnos house, it's also a good opportunity for the two 80-something brothers to spend time with one another.

Up until just a few years ago I'd only met George and Koula once, and very briefly. It wasn't until 2009 when Tony and I were holidaying in Limnos that we finally got to spend some quality time with these lovely people, my Uncle George and Aunt Koula.


George and Koula are still enjoying life to the fullest and even though George has been quite unwell in recent years, it hasn't stopped him from getting on a plane to come to Limnos every year. Koula is an incredible woman, a high spirited, amazing cook and has the most wicked sense of humour. Last year I spent many hours with her in the kitchen documenting everything she cooked up, writing down her recipes and photographing every step. I will blog about some of those recipes in future posts, but today I have to share with you the boiled zucchini miracle that Koula shared with me.

It's those white zucchinis again, performing in a way that the dark-skinned ones just can't live up to. Slightly sweeter and less watery, white zucchinis are more conducive to saladizing treatment. Koula would boil them whole, then slice in them in half and refrigerate, usually just served on their own with a bit of lemon juice and olive oil. One day Koula and I decided to cut them up and mix them with a couple of other ingredients. Koula had some cos lettuce in the fridge, picked some dill from the garden and I went down to the shop and came back with an avocado. George was perplexed, having never eaten or even seen an avocado before in his life, but Koula and I knew that these flavours would work and the various greens would look great together too!

The salad was well received by all, even George, and just a couple of days ago I was so excited to be able to make it once again, here in Australia.


White Zucchini, Avocado and Cos Salad


Serves 4

Ingredients

  • 1 baby cos lettuce
  • 1 large avocado
  • 6 small white zucchinis
  • 1 tablespoon chopped dill
  • 2 tablespoons lemon juice
  • 2 tablespoons extra virgin olive oil
  • 1 teaspoon salt
  • Extra dill for garnishing

Instructions

  1. Wash the zucchinis and boil whole until tender. Takes around ten minutes.
  2. Drain the zucchinis, arrange on a plate, cover with cling film and place in the refrigerator for one hour.
  3. Chop the cooled zucchinis, lettuce and avocado into bite-sized pieces and arrange in a salad bowl.
  4. Whisk the dill, lemon juice, olive oil and salt to make the dressing and pour over salad. Sprinkle salad with extra dill. Serve with a generous piece of vegetarian moussaka.

Wednesday, February 6, 2013

Baked Stuffed White Zucchinis (Papoutsakia)
and an old family house in Limnos


Well I have calmed down a bit since the excitement of yesterday. And as hard as it was to see them go, my precious stash of white zucchinis found their purpose today – two purposes in fact! Baked Stuffed White Zucchini (Papoutsakia), and a White Zucchini, Avocado and Cos salad which I will post in the next day or so.

One of the very few Greek dishes I remember my very non-traditional Greek mum cooking for us as children was stuffed zucchinis. It was a dish she also enjoyed as a child in her equally non-traditional upbringing.


I think not having a whole lot of Greekness drummed into us as kids has only made me more keen to know about my Greekness now. I appreciate and love my culture in a way I may not have wanted to if we'd been brought up differently. I've seen the same phenomenon happen with my own father, and even my you'd-never-believe-she's-Greek mother.

My dad's new-found Greekness started around ten years ago when he developed an interest in a family house that he had a small share in on the island of Limnos.

The 150-year-old house had seen many years of neglect, weather damage and bad renovations, and the once-beautiful, neoclassical house was reaching a point where it was on the verge of collapse. The roof of the three-story building was caving in, the ceilings were sagging and the floor boards were buckling. It was a lost cause, or so it would seem, until my dad came up with the brave and ambitious proposal to bring it back to its former glory.


After years of negotiating with 30 or so family members all claiming to be share-holders of the house (I'm sure many Greeks can relate to this familiar story), in 2008 my dad acquired the final share to become the sole owner of the property.

He now spends eight months each year in Limnos with his wife Julia, dedicated to the restoration of the house and its beautiful mediterranean garden.


It is because of this connection with his homeland and living at the family house for the last ten years that my dad has rediscovered everything it means to be Greek, the good, the bad and the ugly. And he's more Greek now than I ever remember him being when I was growing up.

I will tell you more about the house in future posts as Tony and I have also built quite a connection with both Limnos and my dad's family house.

My mum's own new-found Greekness has mostly come about from now being able to listen to Greek radio, direct from Greece on the internet. It thrills her to bits to hear a Greek voice speaking Greek words, coming from Greece. She tells us often how much she now misses hearing a Greek voice – a longing she's only developed recently, and probably because Greek-speaking was kept to a minimum in our house when we were growing up.

Tony is learning Greek at the moment and mum even delights in hearing him speaking Greek, Australian accent and all. She's also pretty excited about me doing this blog – it's made her think a bit about her childhood and about the food she used to cook for us as children.


It may have been a rare occasion to eat Greek food at home when we were kids, but Papoutsakia stands out as one I remember well. Literally translated to "little shoes", the dish is named this way because the vegetable when sliced lengthwise resembles the shape of a shoe. Often made with eggplant, my mum used to make them with short, fat zucchinis, and I thought my newly acquired little white zucchinis would make the perfect Papoutsakia.

They are traditionally stuffed with a minced meat sauce, then topped with bechamel sauce and baked in the oven. My recipe uses a rich tomato and onion sauce with grated cheese on top. It's so simple but tastes so yum.

Baked Stuffed White Zucchini (Papoutsakia)


Serves 4 (4 zucchini halves each)

Ingredients

  • 8 small white zucchinis*
  • 1 large onion, diced
  • 1 clove of garlic, crushed
  • 1 400g can of chopped tomatoes
  • 1/2 teaspoon cinnamon
  • 1 teaspoon ground cumin
  • 1 teaspoon dried oregano
  • 1 cup of grated hard cheese**
  • 1/4 cup parsley, finely chopped
  • Salt and pepper to taste

* White zucchinis are smaller than regular dark-skinned zucchinis, and tend to be relatively fatter which makes them suitable for shelling out. The ones I used were only about 10 to 12 cm long. If you can't find white zucchinis, regular zucchinis will work just as well, but look for shorter, fatter ones.

** Many hard cheeses are made with animal rennet. You might want to check the label for a non-animal rennet cheese.


Instructions

  1. Cut the zucchinis in half lengthwise and place cut side up on a greased baking tray. Coat zucchini well with olive oil spray and bake in oven for 30 minutes at 200 degrees celsius.
  2. While the zucchinis are cooking, fry onions in oil until soft. Add garlic and fry for a minute or so. Add chopped tomatoes, cinnamon, cumin, oregano, salt and pepper to taste. Allow to simmer for 10 to 15 minutes.
  3. Remove zucchinis from oven and allow to cool. Using a sharp knife, score around the edge of the flesh of each zucchini, about 2 to 3 millimetres from the skin, then use a spoon to scoop out the flesh and add the flesh to the tomato mixture.
  4. Lay each zucchini shell in a baking dish and fill with the tomato mixture. You will have some tomato mixture left over but this can be served in a separate bowl as a side sauce. It goes great with crusty bread too!
  5. Top each stuffed zucchini with grated cheese and carefully pour water into the tray, not allowing the water level to come above the zucchinis. It should be about 1 centimetre deep.
  6. Cook in oven at 200 degrees celsius for around 20 minutes, or until cheese is golden.
  7. Serve sprinkled generously with chopped parsley.

Tuesday, February 5, 2013

White Zucchinis


Ohhhh I'm so EXCITED! Look what I got today!!!!!

These are very special zucchinis. Very, very special.

Well, they're special to me.


Have you ever been totally obsessed with a vegetable that you thought you'd never be able to get your hands on in your home country? A vegetable that you'd once tasted in a far-away place, a paradise that you were convinced was some kind of special haven for that elusive vegetable? Do you see that vegetable floating above your bed at night and cook with it in your dreams? (or is that just me?)


Well today that beautiful vegetable that I've been drooling about since last July when Tony and I were in Greece is now sitting with five others in a basket right beside me. A little family of six gorgeous white zucchinis, just waiting for me to do with them as I wish. They are right here. In the flesh. Looking at me! Oh this is so exciting!!!


A new fruit and veg shop opened recently just a few blocks from where we live and I'd paid them a visit last week to meet the owners and inspect their goods. It's a high-tech shop with the vegetable section in a separate refrigerated room. Very impressive. And I was delighted to discover the owner is Greek. I couldn't help but mention my obsession with white zucchinis and nearly fell to my knees when he said "Oh yes, the sweet Greek ones".

Oh my god, I actually squealed with glee, like a teenager meeting Justin Bieber. The poor shop owner didn't quite know how to take my reaction and cautiously said, "Er, I'm not sure if I should be telling you this but we do get them in occasionally". WELL SWALLOW ME WHOLE I COULD NOT BELIEVE WHAT I WAS HEARING. And the poor guy couldn't believe what he was seeing. I was practically crying.

I left the shop and have been back every day since, and TODAY, they were there.


I need a day to calm down before I decide what to do with them but rest assured because I swear on Aunty Betty's grave that the next recipe that I post on this blog will definitely feature white zucchinis.

I would love to know about your vegetable obsessions. Not in a creepy kind of way. Just in an empathetic kind of way (so as not to feel like I'm the only one with this disorder).